Wednesday, December 14, 2011

Backyard rock wall and planting bed.

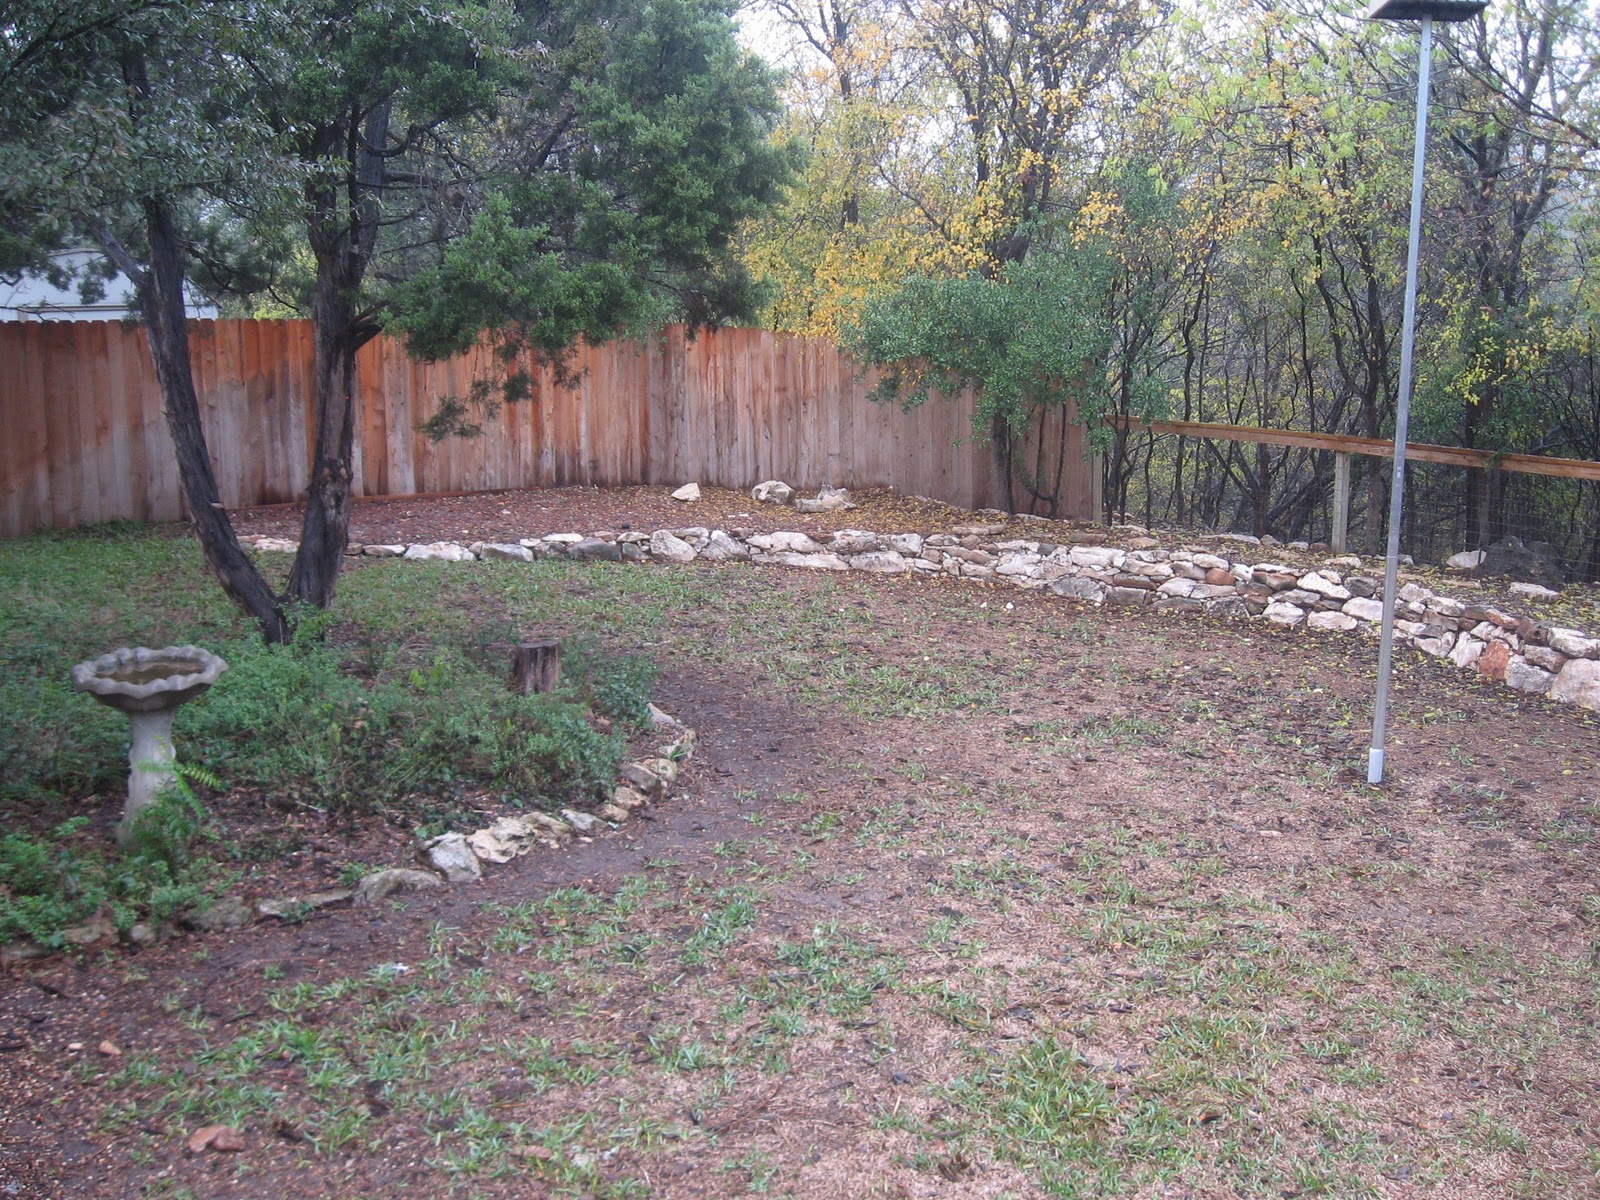
I am about 90% done with the back rockwall and raised bed.  I need to add 1/2" river rock to the crevases between the boulders to give the wall a smooth finished look, but the structure it self is done.  I estimate that I used close to 20 yards of scrapings from gardenville to fill it in.  You can also see that my grass is all but gone.  I plan on re-sodding in spring, once I have all hardscape completed.  


From the aerial view you can see the two trees in the center of the frame.  I did not want to bury these trees so I created a little "cut-out" of the bed.  I did the same for the group of trees on the far left (almost out of view.)  Once I stood back and examined it I realizied that I could "connect" the two cut-outs, by contuining the rock on the oposite side of the fence.  This gives the apearance of the straight fence cutting through the flowing bed and really breaks up the straight lines.


You will also see that I am going to create a stepping stone path through this bed.  This will actually connect to my gravel paths thus creating a full loop for stroling the garden.


The big wide open space on the far lef side of the bed (in front of the privacy fence) is where we are going to create a play ground for the kids.

Friday, October 14, 2011

Night Time in the Garden

There is a full moon out tonight and it is perfectly framed within the arbor.  I only wish I had a better camera to capture the sight.  The lighting in the garden gives off a romantic glow, which fits perfectly on this autumn night.  I could sit out here for hours, watching the wildlife.  The garden is a different ecosystem at night.  The birds, butterflies, dragonflies, and squirrels that roam during the day have been replaced with bats, owls, deer, skunks, opossums, and raccoons.  The waterfalls seem much louder and the whole area seems alive.     


Thursday, October 13, 2011

Backyard Raised Bed...Before and After

Here are the before and after pics of the raised planting bed and retaining wall.  I am very happy with the way it turned out.

As you can see, the wall is aprox 1.5 feet tall and filled in with 1 cubic yard of "scrappings" soil from gardenville.  I will eventually fill in this bed with plant material including, trailing rosemary, lantana, Bi-colored iris, society garlic and Indian Hawthorne. 

Tuesday, October 11, 2011

Backyard Raised bed phase 2

So I have completed the second phase of the backyard retaining wall and planting beds.  This bed extends from the arbor to the pond.  I love the way it came out.  It started a little slow this morning but once I got going, it really fell together.  I picked up 1 cubic yard of scrappings from gardenville...man I just love that stuff.  $5.00 per yard.  


Baxter hanging out on the new planting bed.


Thursday, October 6, 2011

Pond...before and after

I have to say that I am more than ecstatic with how the pond came out.  Below you can see the old pond photographed around September 2010 and March 2011.  Then the pond now, September 2011.  It doesnt even look like the same area.


The old pond photographed a week before the re-build.  


The new pond as of September 2011.  The aquatic plants have filled in nicely.  For bog plants I have pickerel weed, sweet flag iris, dwarf umbrella plant and powdery thalia.  For oxygenators, I have hornwort and anacharis.  I also have 2 hardy Lillie's and 1 tropical lilly.  The plants around the edge include nandina, Mexican honeysuckle and asparagus ferns.   

Tuesday, October 4, 2011

Backyard Raised Bed: Phase 1

I have completed the first leg of the natural rock retaining wall and planting beds.  I know of a neighborhood under construction that has the motherload of rock piles.  Ive been making mutiple trips, filling entire pickup truck bed loads, and I havent even put a dent in the rock piles!  Eventually, all of the mulch beds in the backyard will be raised like this.  It is also going to help when its time to start planting shrubs, in that I wont have to dig in rock!  For the fill, I use Gardenville "Scrapings."  Scrapings are like the bottom of each pile, pushed into one giant mound.  Its dirt cheap...(pun intended) at $5.00 per cubic yard.  I love it because it has a little bit of everything.  Soil, compost, gravel, granite, mulch...it does have some trash in it...i.e. grass clippings and leaves, but for $5.00 per yard you cant beat it!  I got an entire heaping truck bed full for $7.50...(1-1/2 yards, about all my truck can handle.)


Sunday, October 2, 2011

Garden Pathways: Semi Completed

The pathways are dug out and filled in.  I am really happy with the shape and curvature of them all.  Four pathways converge into a patio of sorts.  I dug all of the pathways out about 3-4 inches below the existing grade of the lawn.  I then filled them in with 3/8" Texas Blend Pea Gravel from Gardenville.  I like the pea gravel because it provides superior drainage and with 3 dogs it doesnt stick to their feet like decomposed granite does. There will eventually be a natural rock edging...(I have part of the pathway semi-complete.)  I love a natural rock edging, but I am very particular with how it is installed.  Just for the record, what you see below is very very rough draft.  Once completed, it will be very uniform.


Garden Pathways: A Way to Get from Here to There.

After weeks of planing and drawing, and re-planning and re-drawing we finally got to work digging out the backyard garden pathways.  My dad was kind enough to lend me a hand and Ady decided to help out too!  I was completely surprised in that the soil we dug out was like black gold.  Have you ever seen those HGTV garden shows.  They are always filmed up north and when they dig, the soil looks fake?  Well thats what it was like...seriously!   As I have mentioned before, I'm situated on a limestone cliff and there are plenty of areas of the backyard with bedrock protruding from the soil.  This path however was 60 feet long, 3-4 inches deep and we never hit a single rock!  


Sunday, May 1, 2011

Front Yard retaining wall and planting bed.


So most of my gardening will be dedicated to the backyard, as it is a blank slate.  However, there are a few things I want to acomploish in the front yard.  The front yard is very tradtional, however designed very well.  Yes, there is a lot of grass, but with the dappled shade the St Augustine performs very well.  There is an established live oak adjacent to the driveway with just a small (3' diameter) steel edging ring around it.  I have created a nice big planting bed instead.  I did however leave the steel edging ring in place as it will keep mulch and dirt from piling against the trunk and allow for good air circulation.     


Step 1.  Mark out the planting bed area and add landscape spikes. 


The landscape stakes allow for a string line to encircle the bed.  This way I can make sure the retaining wall is level all around. 


The finished bed and retaining wall.  Notice the exposed root flare and steel edging inner ring.


The bed filled with plant material.  Upright Rosemary, Butterfly Weed, Blue Plumbago, White Plumbago, Loropetalum, Butterfly Iris and Caryopteris Clandonensis "Dark Knight"
.


Butterfly Weed with blue and white Plumbago


Dark Knight with butterfly iris.